Text Encoding
When translating occasionally you might need to process content, after it has been exported from your system, before passing it to a translation agency and vise versa.
For cases like this, you can setup specific replacement templates in your connector's settings. To do so:
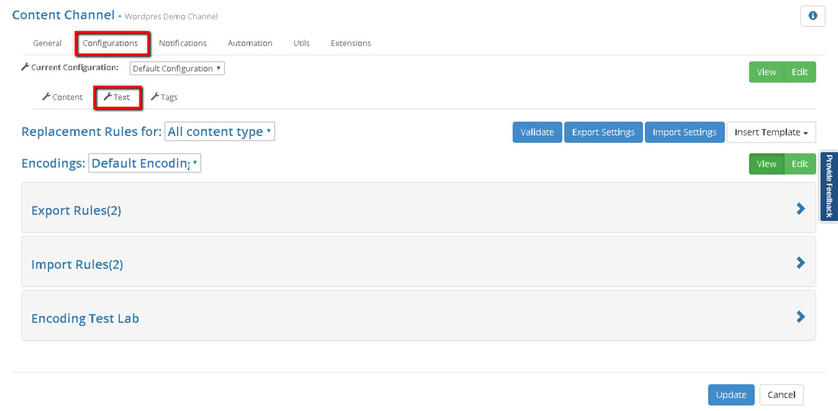
- Open your connector's settings
- Open the "Text" tab.
New Encoding
To create a new encoding:
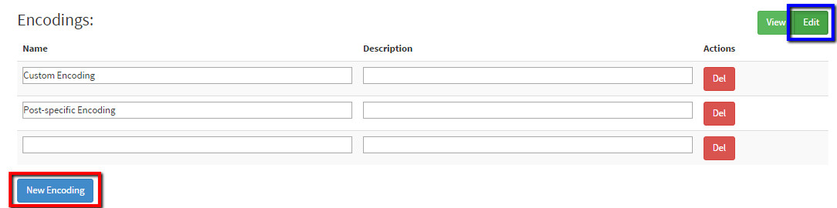
- Switch to "Edit" view under the Encoding Tab.
- Click "New Encoding" button. This will add a new row to the list of already existing ones.
In this view, you can specify encoding's name and a short description. You can also change these values for all existing encoding. When all the adding/editing is done you can switch back to the "View" mode.
The list of encoding will be automatically updated now.
Encoding Rules
There are two encoding rules users can specify namely:
- Export rules - rules applied to the content during export process
- Import rules - rules applied to the content during import process
Export Rules
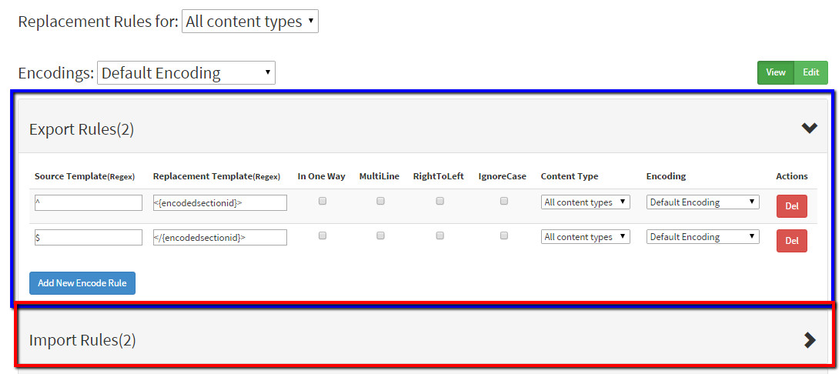
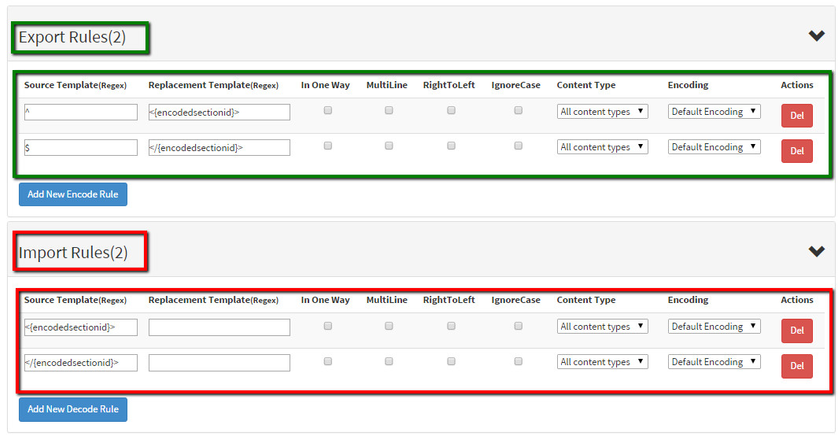
To create a new export rule, click on 'Add New Encode Rule' under the 'Export Rules' section. This will add a new row to the list of rules. In order to create a new rule, users should specify following attributes:
Lets take a closer look at a Rule's attributes, for this purpose, let us create a new export rule. To do this, click "Add New Encode Rule" button in the "Export Rules" section.
- Source Template(Regex) - a regular expression, describing a matching template for a source content.
- Replacement Template(Regex) - a regular expression, describing the replacement template.
- In One Way - specifies that this change should not be considered as an error, when importing content back and validating it comparing to the original. If you enable this, it will mean that you do not plan to create a reverse operation for this encoding rule.
- MultiLine - changes the meaning of ^ and $ so they math at the beginning and end, respectively, of any line, and not just the beginning and end of the entire string.
- RightToLeft - specifies that a search will be performed from right to left.
- IgnoreCase - specifies case-sensitive matching. Ignores case while matching if enabled.
- Content Type - specify a content type, rule should be applied to.
- Encoding - specify an encoding, you are using the rule in.
Content Type - These rules can be defined for all the content types, or for specific ones. Under the 'Content Types' field you can define the content type you are viewing rules for.
Encoding - The "Encoding" tab is used to additionally group export/import rules. When creating a rule, you define which encoding it belongs to. By default the choice is 'Default Encoding'.
You can create some more custom ones here and use these under "Tags" tab of your connector's settings.??

In the example above, we've created two export rules, which basically do the following: they wrap all the content in the {encodedsectionid} tag.
Encoding Check
To check how your encoding and decoding rules work, you can use the "Encoding Test Lab" section.
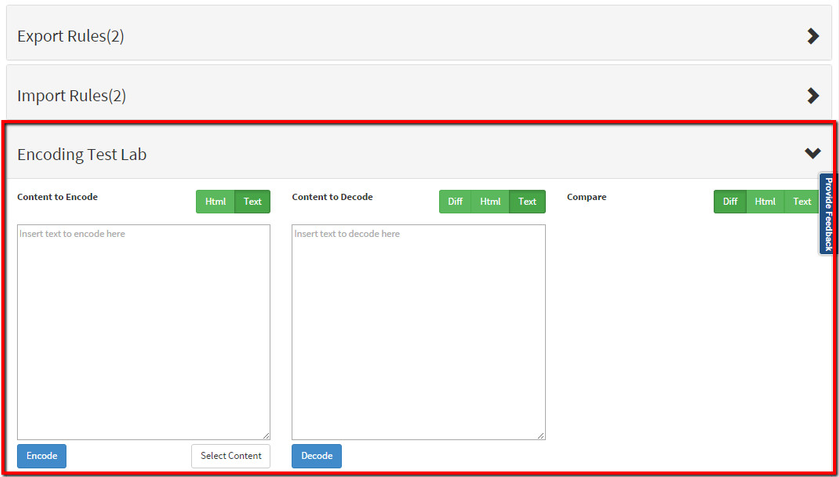
It allows you to virtually encode or decode a piece of content, in order to make sure rules are set correctly. To perform this check:
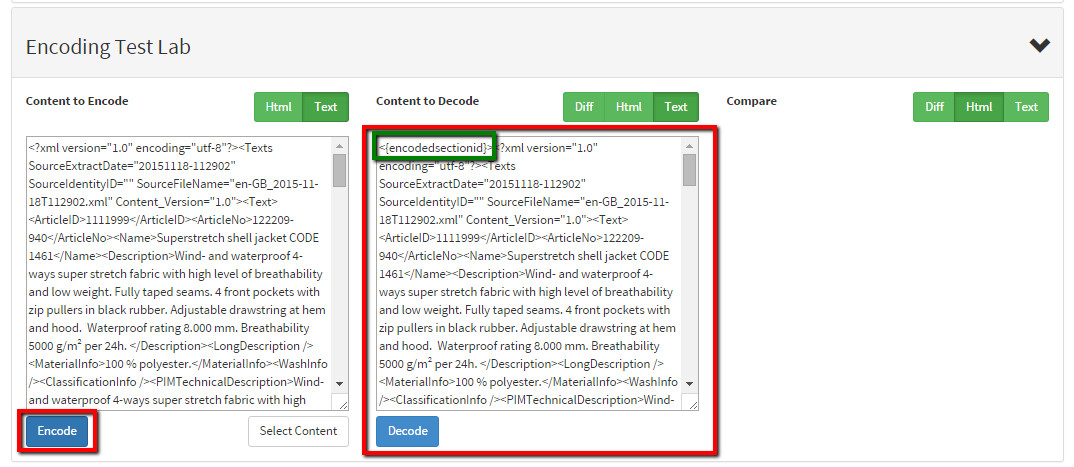
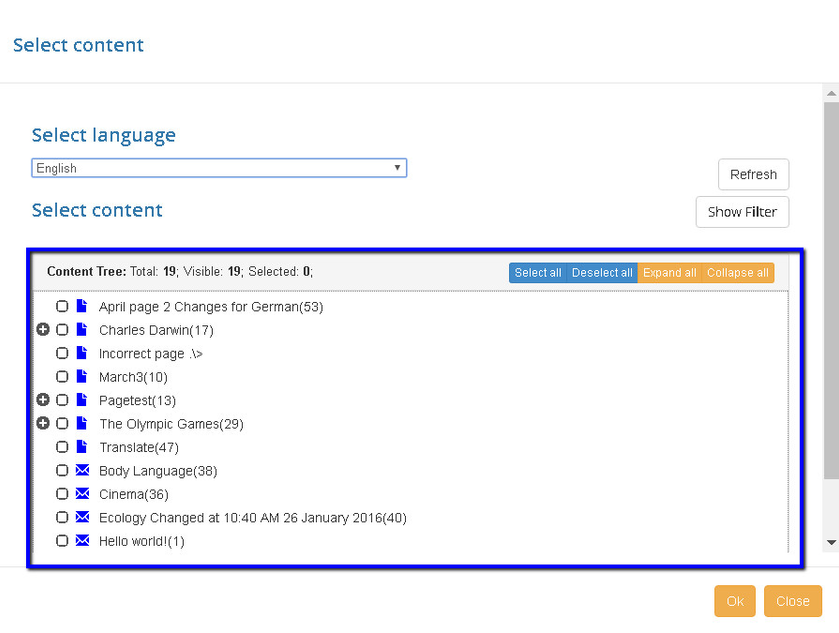
- Click the 'Select Content' button in the bottom of the 'Content to Encode" section'. This will open the "Select content" form for you. Alternatively, you can manually type in an example you want to encode/decode.
- If you choose to select content, first select the source language.
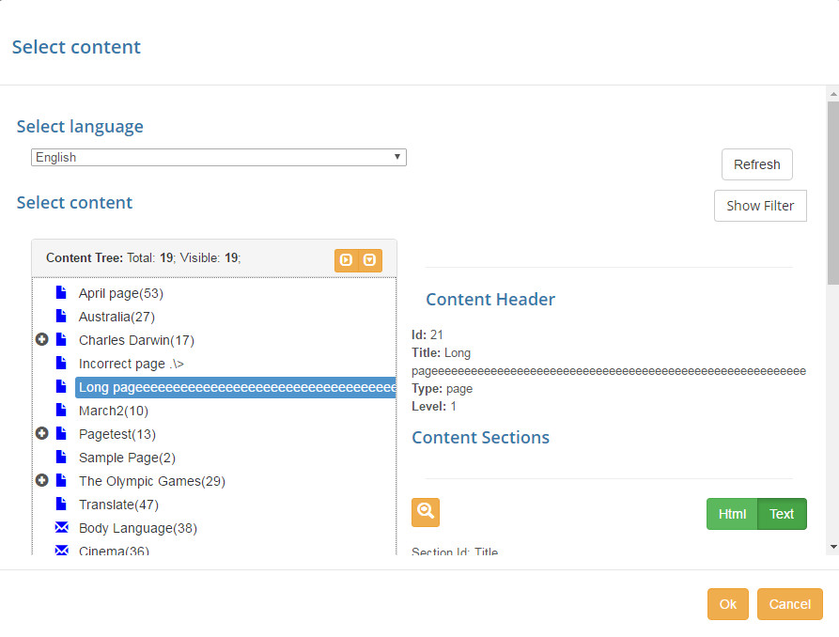
- Now click on the selected content, this will open a preview in the area to the right. In the preview area you can pick a content section you need and click the 'View Content' button. This will open the selected content's section in the encoding test lab:
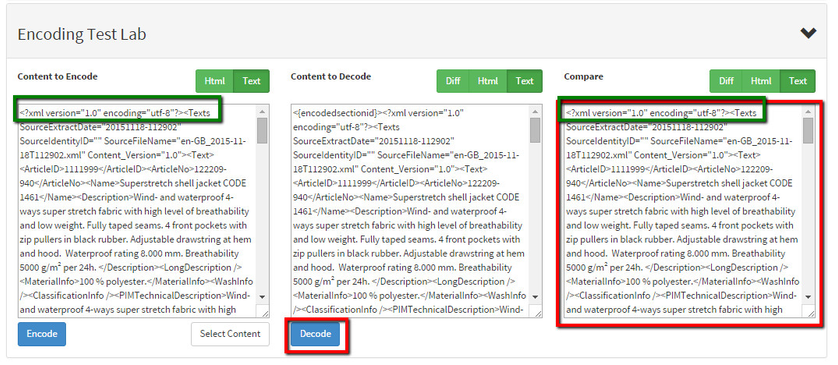
- In the encoding test lab, you can switch between HTML and plain Text overview modes when selecting a content. Besides that, a "Diff" overview mode is available in the "Content to Decode" and "Compare" sections of the lab.
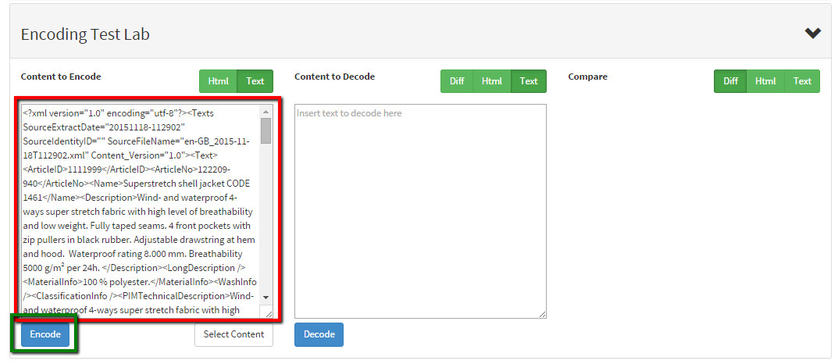
- After you have opened a content in the lab, you can click the "Encode" button, this will encode the content you've selected, using the default encoding rules you have.
Encoding Validation
As you can see, we have wrapped all the content into the <{encodedsectionid}> tag during encoding and then unwrapped it during decode operation.
Encoding test lab is not the only place where you can check your encoding/decoding rules. In order to check all the rules on a specific content, you can also use the "Validate" function under the text tab.

When you click "Validate" button, a content selection form appears. On this newly opened form you have to select a language and a content you want to run test on.
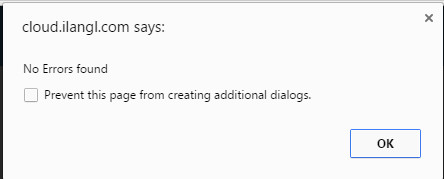
After you have selected a content, you click "Ok" button and system runs a virtual encode/decode operation. Shortly after, you will get a report on the operation result, it will appear in a pop-up.
If encoding and decoding rules are set correctly, and after the decoding, content's structure remains the same, no errors will be displayed.
If the structure will be broken, you will be able to see it and fix before the real operation. You should also remember that if you set "In One Way" rule's setting to "Yes", system will not consider the change applied by this rule as a breaking for the content's structure, when checking it after decoding.
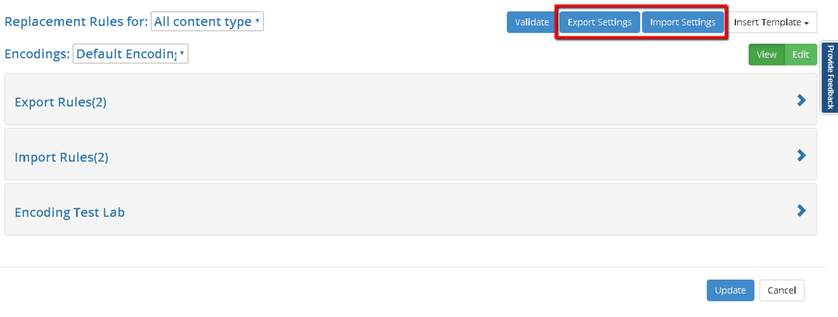
Export/Import Settings
One more important feature here, is that you can export/import settings from an XML: