How to add support for new file extension?
Setup New Content Type
To add a new content type, your files connector is going to use, you have to switch to the "Edit" mode in the "Content Types:" section.
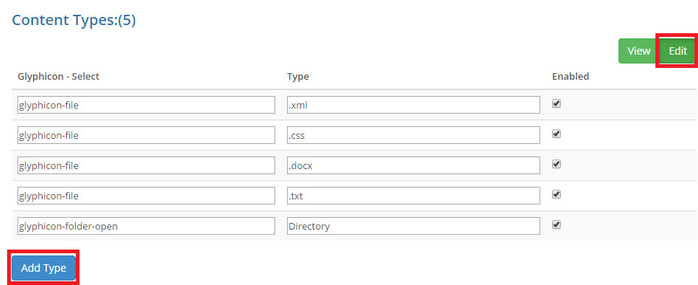
In this "Edit" mode you click "Add Type" button and a new empty line will appear. For a new content type following parameters should be set:
- Icon - this is a base 64 encoded image, which will represent a new content type.
- Type - content type, which is a file extension or a directory.
- Enabled - setting defining whether this content type is enabled or disabled for your files connector.
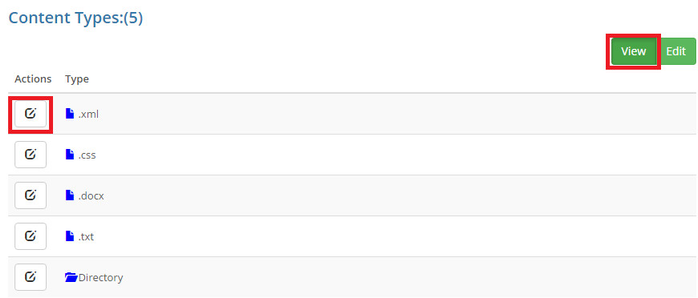
Besides adding new content types, you can also edit ones that have already been added.
After you have added a new content type, you have to specify some content type settings, which is "encoding" in case of a file type. In order to do that you have to get back to a "View" mode and click the "Edit content type settings" icon against a content type.
And then, in a newly opened "Content Type Settings" form specify settings: choose processing option (skip or enable) and specify encoding value, then click "OK" button.
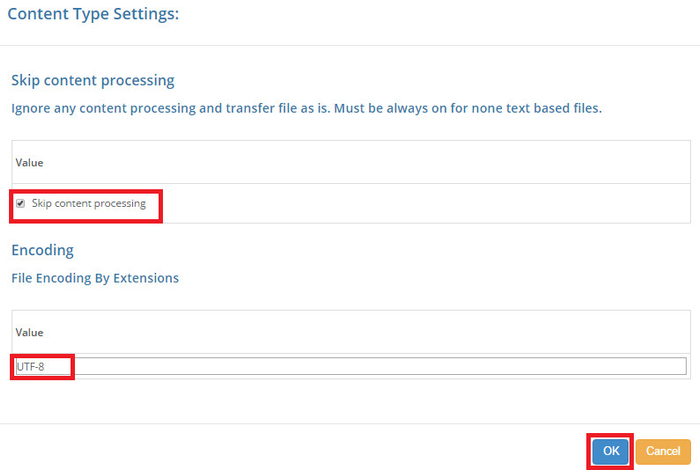
- Skip content processing - .option can be enabled or disabled. if option enabled, content processing will be ignored and file will be transfered to translation tool as is. This option should be always enabled for none text based files like .docx
- Encoding - file encoding by extensions
That is it, now a new content type will be available for your files connector. You can add/edit/enable and disable content types using this "Content" tab of your files connector. And that is pretty much it, your files connector is now set up and you can use it. However, if you have to deal with some complicated cases, where a content processing is involved, you might want to check this article for more information.