| Note |
|---|
Before creating a connection you should install need to install Content Provider on you your local environment. |
How to Create Connection
To check configuration of your system with iLangl Cloud, you can create a new channel. Follow the steps described below to setup set up a new channel:
- Ensure that you logged are logged in on https://cloud.ilangl.com
- Go to 'My Channels' section and click 'Add New' to create a new channel.
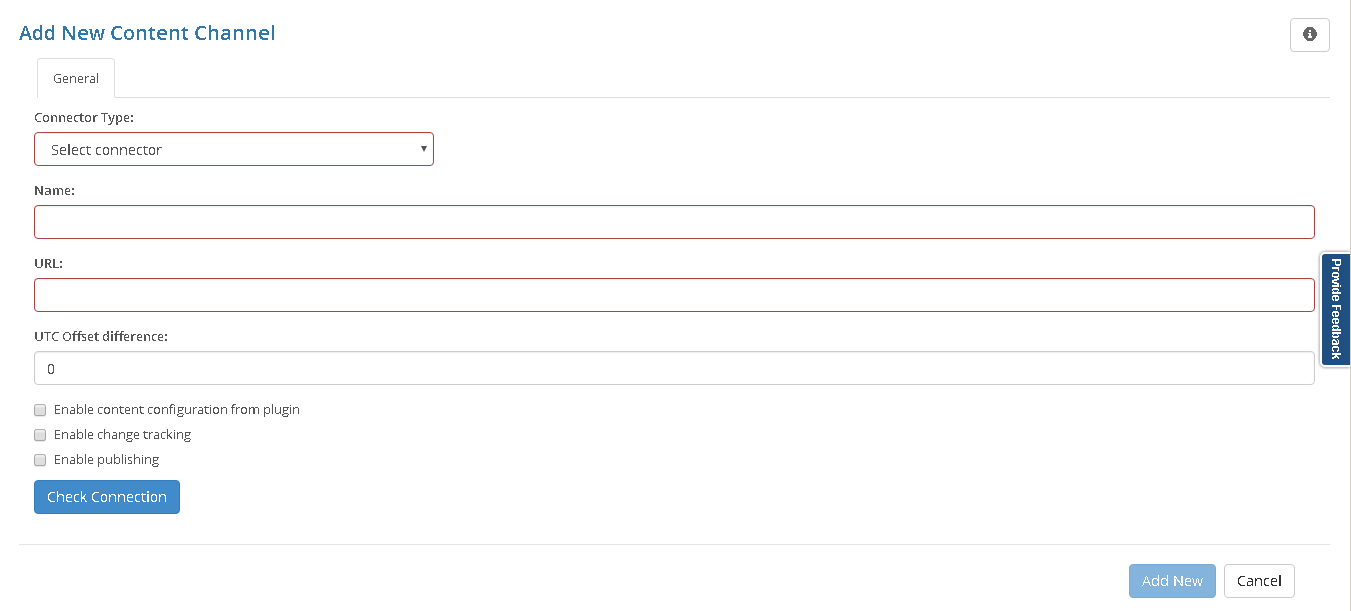
Choose a Connector Type connector type (required field) from the drop-down list menu to match your CMS type and version.
Note Further configuration will depend on the connector type you choose. Detailed You can find more information about configuration of the CMS specific connector configuration you can find onin the Connectors page.
- In the field 'Name' type channel name (required field) - type channel name.
- In the field 'URL' (required field) enter base - enter base URL of your website.
- In the field 'UTC Offset difference' (optional field) - you can set up a UTC offset difference between iLangL cloud and content data source.
- You can choose option 'Enable content configuration from plugin' in order - mark it to give access for Configuration to Content Channel Configuration from plugins the plugin view.
- You can choose option 'Enable change tracking' for activation - mark it to activate 'Export changes only' functionality. By default this option is disabled and will not be available during Export contentbe available during the content export.
- You can choose option 'Enable publishing' - mark it to enable 'Import and Publish' option for channel plugins.
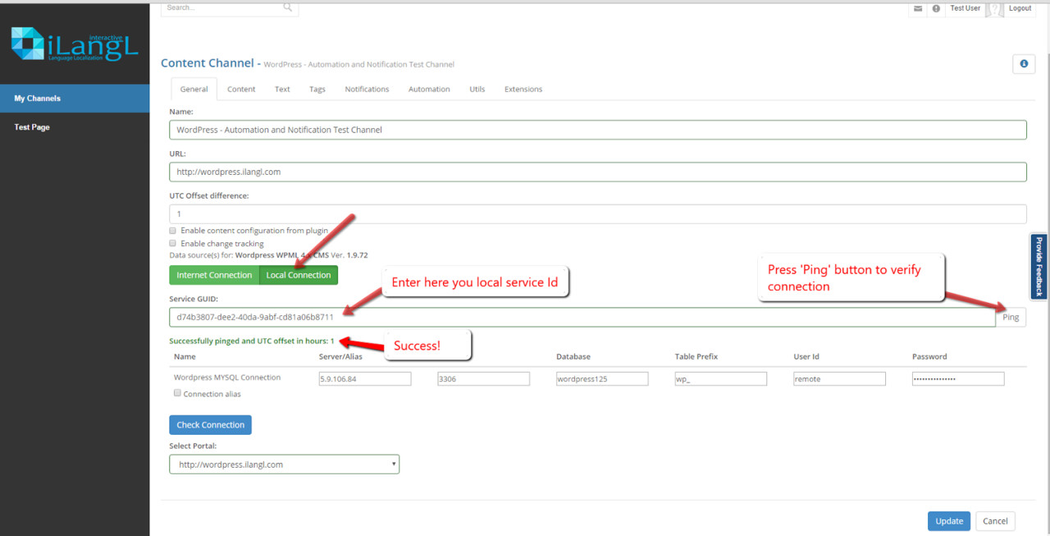
Enable 'Internet connection'/'Local connection' button (required field) - choose 'Local connection' button.
In the fieldNote This article describes how to create and validate the Local connection. For the Internet connection please go to a special article
The article on Internet connection can be found here.
- 'Service GUID' (required field) - enter local Content Provider of service GUID.
- Click 'Ping' button to make sure that connection works well. If the connection works well In case of success, system will display 'Successfully pinged' message.
- If it is not successful refer fails, please refer to troubleshooting guide.
...
You have two options now to specify local connection:
Option 1: Specify local connection in the cloud channel
- In the 'Server field ' - enter server IP address, domain name or path to the local storage (depends on Connector tyoe the connector type you have choosenchosen).
- In the Port field 'Port' - you can specify server connection portEnter .
- 'Database' - enter the database name in the Database fieldIn the field .
- 'Table Prefix' (optional for some CMSs) - enter the database table prefix.
- In the field 'User Id' enter - enter the user name for connection that will be used to connect to your site or database (depends on the CMS you have choosenchosen) Enter user password in the field Password.
- 'Password' - enter user's password.
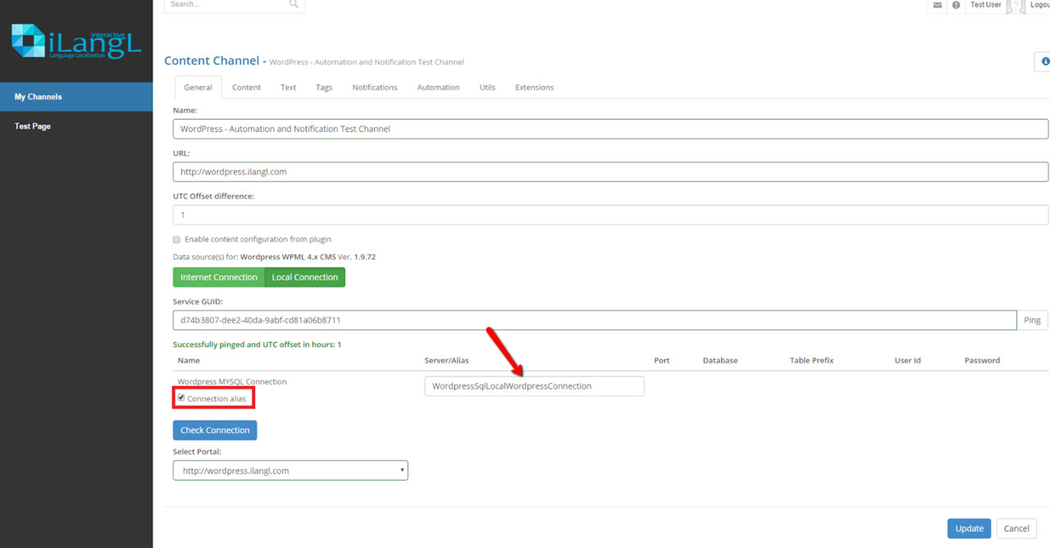
Option 2: Use connection alias of connection that was specified in ‘Content Provider’ the 'Content Provider' configuration file
- Check ‘Connection alias’ 'Connection alias' checkbox below the connection tab and enter your connection alias.
...
How to Validate Connection
- Click 'Check Connection' button.
- If validation passes successfully, you will have to choose next step will be choosing a portal in “Select Portal” fieldthe 'Select Portal' field.

Benefits
Our team developed the Content Provider to overcome the multitude of challenges posed by using the internet to connect connection to a remote content data sources. Here is a short list of challenges has overcome through its of challenges tackled by Content Provider.:
Reduced Complexity - When a remote connection is setup set up from the data source the process becomes complicated as users face firewall issues. They might need remote permissions, static IP required, and other permissions just to set up the connection.
Content Provider largely reduces the complexities involved in the remote connection process by switching to local connection approach.Increased Speed - When the content increases in size working over an internet connection becomes cumbersome.
Content Providers interacts with content data sources via a batch of small requests. Each request that is sent over the internet has only a small delay. For instance, a good ping time takes only about 30 milli seconds. When the amount of content and number of requests increases the impact Content Provider has on the system performance is visible. The Speed of import and export operation is increased tremendously. The performance in an intranet connection scenario is very high as the ping time is less than 1 millisecond.Improved Security - Security becomes an issue when access to the internal content data happens through an external connection.
Our Content Provider offers improved security to your data as it can be hosted at customer environment behind the firewall. It enables interaction with content data source directly through the intranet environment.