Internet Connection
- Natalia Sandovska (Unlicensed)
- Support Ilangl
- Sergey Yuryev(gmail)
Owned by Natalia Sandovska (Unlicensed)
Last updated: Apr 02, 2018 by Support Ilangl
How to Create Connection
To establish connection between content data-source and iLangl cloud, you need to create a content channel:
- Ensure that you are logged in on https://cloud.iLangL.com
- Go to 'My Channels' section and click 'Add New' to create a new channel.
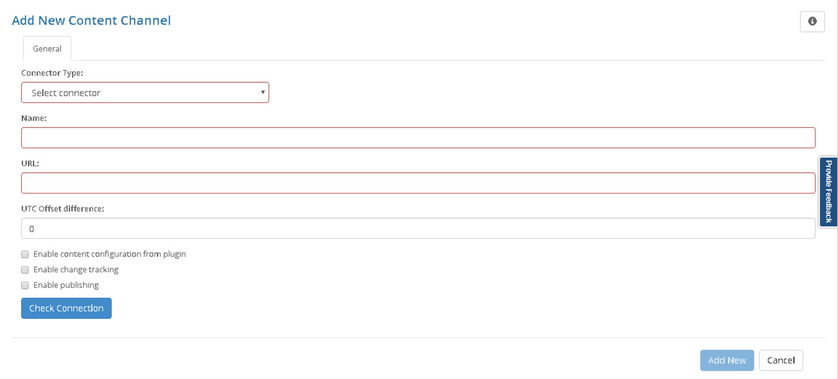
Choose a connector type (required field) from the drop-down menu to match your CMS type and version.
Further configuration will depend on the connector type you choose. You can find more information about configuration of the CMS specific connector in the Connectors page.
- 'Name' (required field) - type channel name.
- 'URL' (required field) - enter base URL of your website.
- 'UTC Offset difference' (optional field) - you can set up a UTC offset difference between iLangL cloud and content data source.
- 'Enable content configuration from plugin' - mark it to give access to Content Channel Configuration from the plugin view.
- 'Enable change tracking' - mark it to activate 'Export changes only' functionality. By default this option is disabled and will not be available during the content export.
- 'Enable publishing' - mark it to enable 'Import and Publish' option for channel plugins.
'Internet connection'/'Local connection' (required field) - choose 'Internet connection' button.
This article describes how to create and validate the Internet connection. The article on Local connection can be found here.
- Click 'Ping Cloud Server' button.
- If the connection works well, system will display 'Successfully pinged' message. This is the way to get our cloud IP address that should be accessible from your server for successful internet connection.
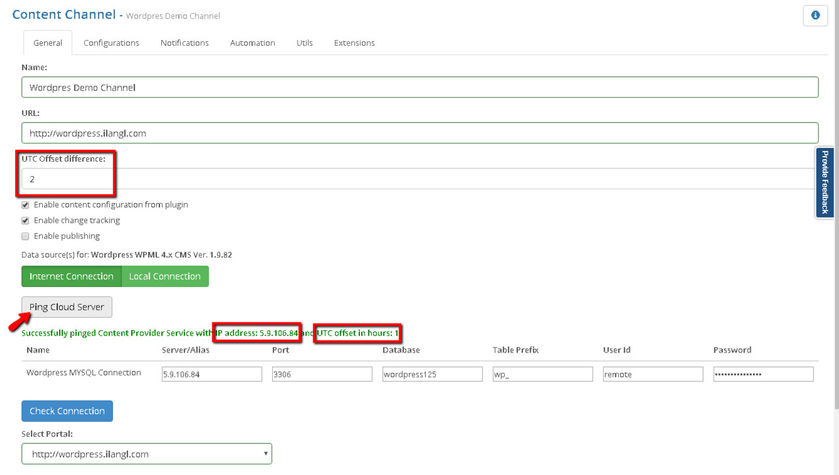
How to Specify Connection
- 'Server' (required field) - enter server IP address or domain name.
- 'Port' (optional field) - you can specify server connection port.
- 'Database' (required field) - enter the database name.
- 'Table Prefix' (optional for some CMSs) - enter the database table prefix.
- 'User Id' (required field) - enter the user name that will be used to connect to your site or database (depends on the CMS you have chosen).
- 'Password' (required field) - enter user's password.
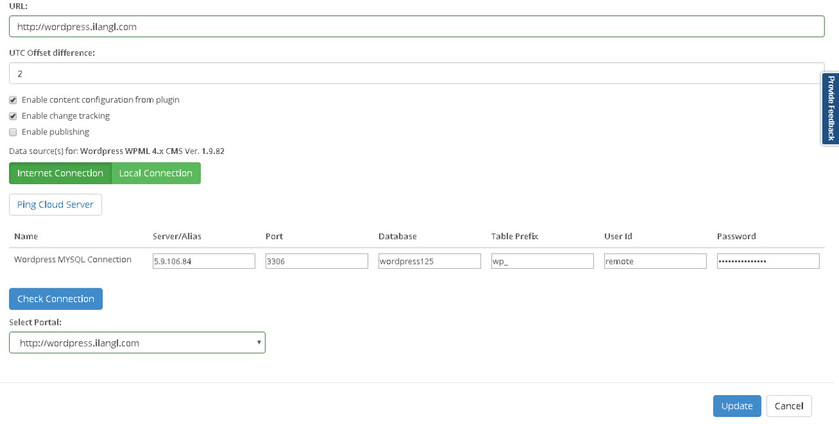
How to Validate Connection
- Click 'Check Connection' button.
- If validation passes successfully, next step will be choosing a portal in the 'Select Portal' field.
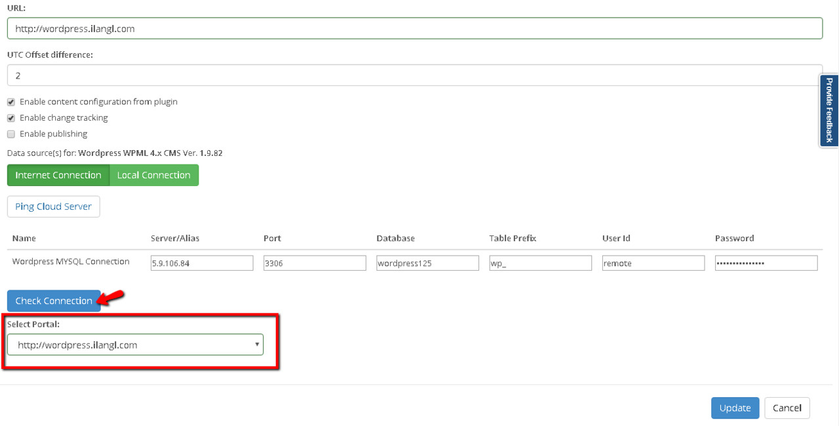
- If validation fails:
- Make sure you entered correct IP address.
- Make sure your firewall allows connections to your server.
, multiple selections available,