If you want to export content from your system and send it CMS to memoQ Server, please follow the steps below:
1) First things first: open Open the memoQ Server plugin. To do this, click the " memoQ Integration" icon next to your content channel (provided that memoQ integration is enabled and the content channel is active).


You will be forwarded to the project page, and the next thing to do is: 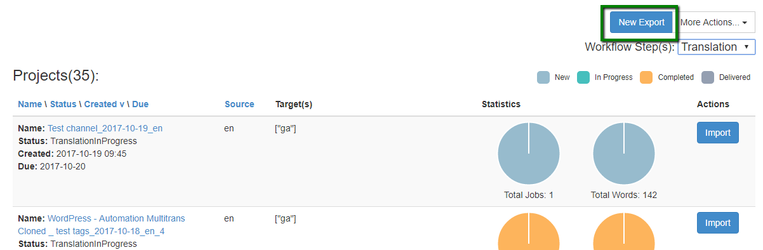
2) Click the 'New Export' button.
This will open a content selection form.
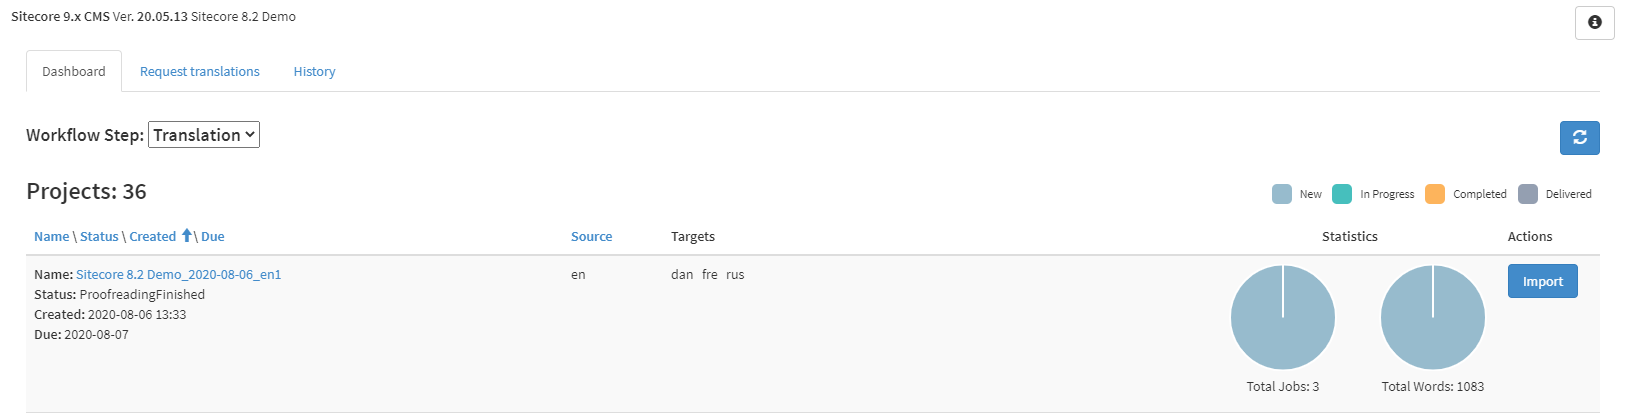
3) Select a source language and content you want to export. Dashboard tab where you'll be able to overview all your projects.
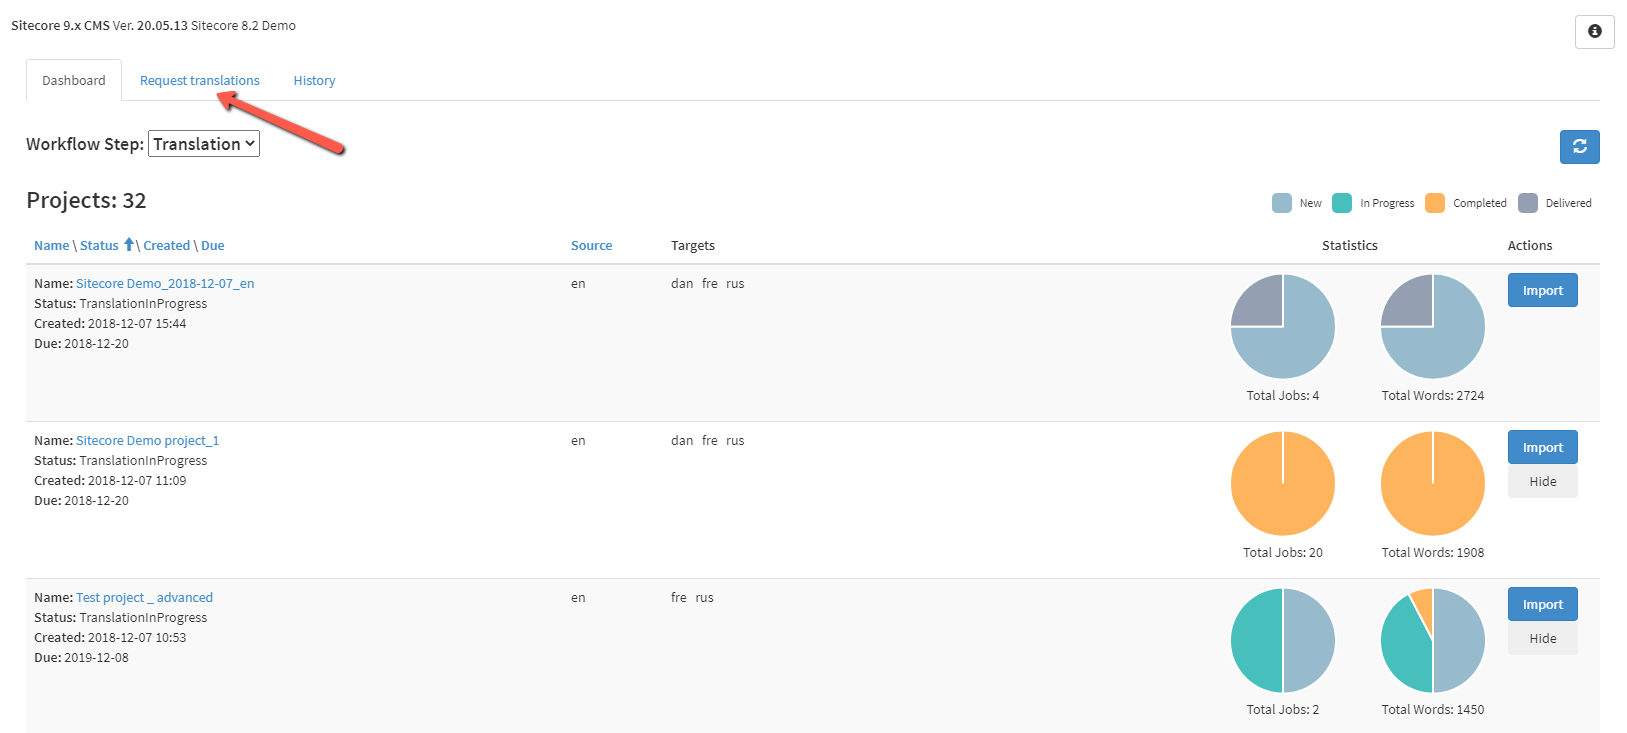
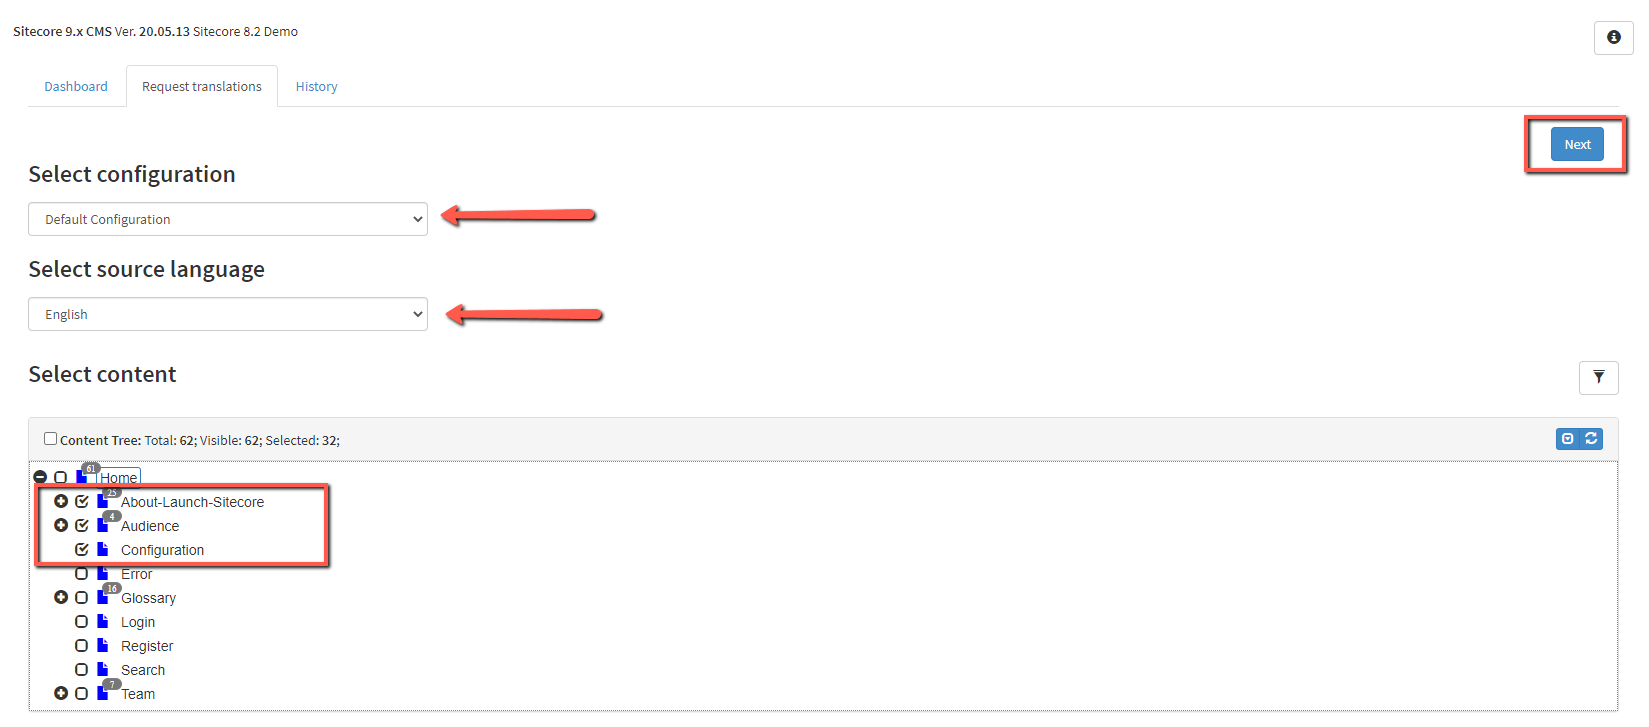
2) Move to the "Request translations" tab to choose the content for translation.
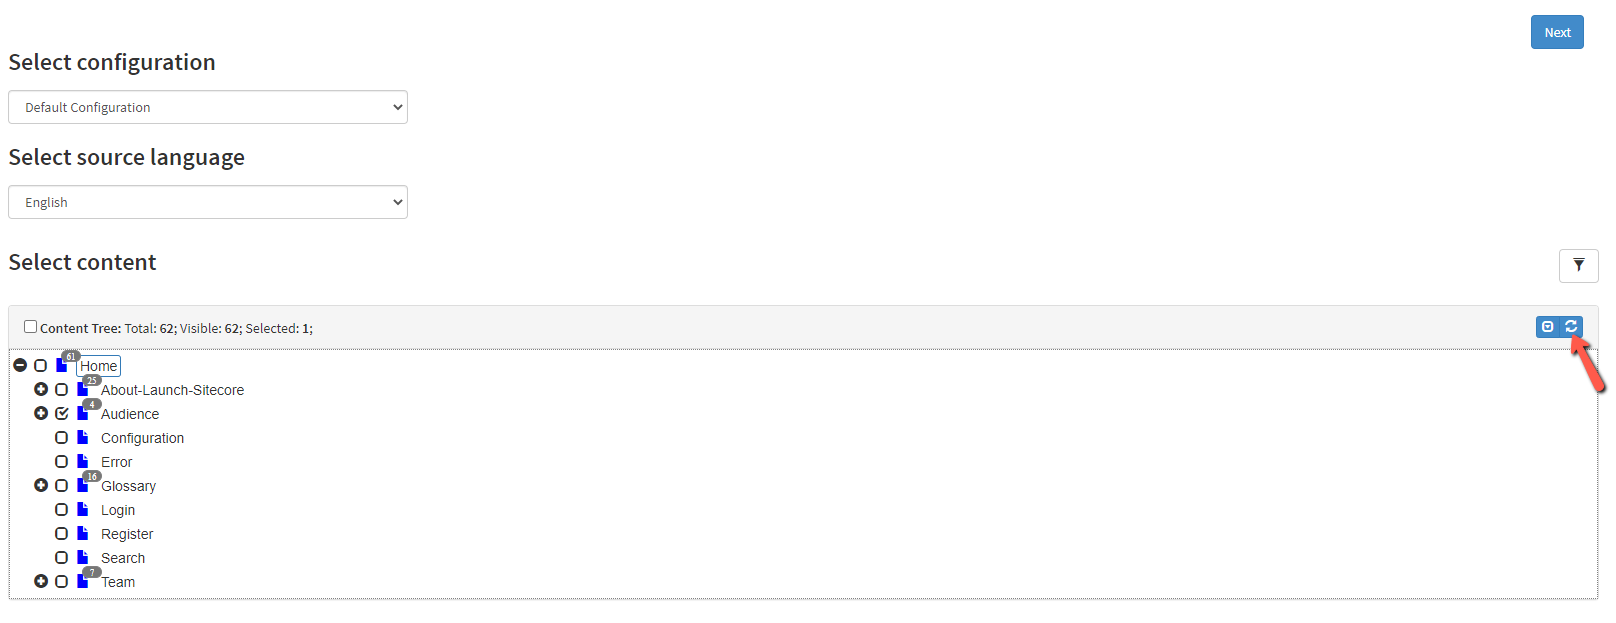
3) Select a configuration, the source language, and tick the checkbox of the pieces of content you need to request for translation. Click the 'Next' button to proceed with the translation request.
| Note |
|---|
If you can't find a source language you need, please, |
...
check your language mapping. |
...
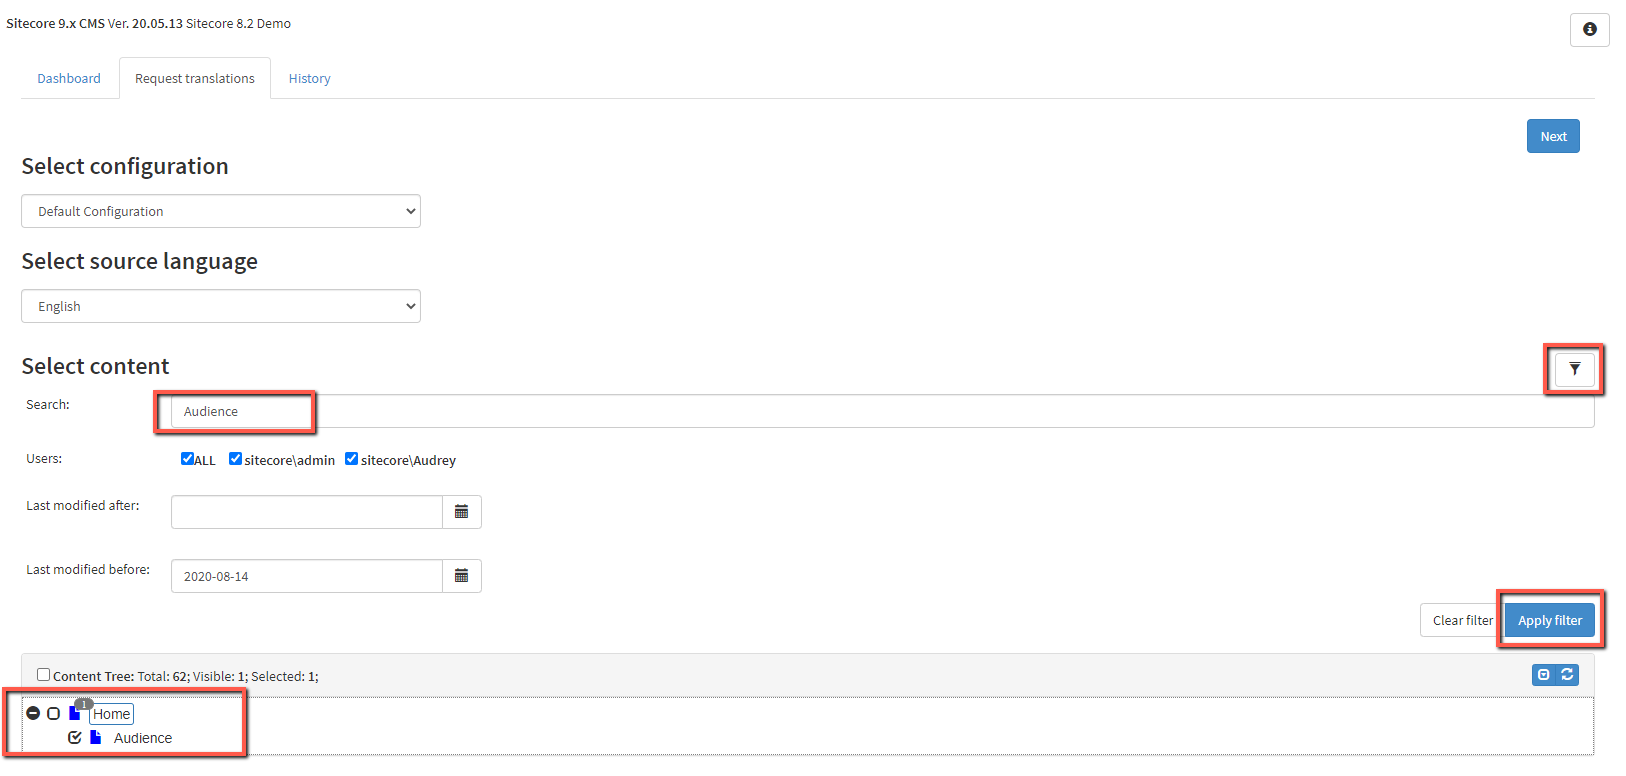
4) You can use filter to sort filters to find specific pieces of content and aggregate the selection by multiple criteria like content state, . such as a specific word in the content, publisher, time of the last change. a user who applied the latest changes, last modified date. This helps to export request various content for translation in one go. Just select 'Show filter' button, click the filter icon to set the selection criteria and click 'Apply filter'.
To expand the whole content tree, click on the icon marked on the screenshot below. 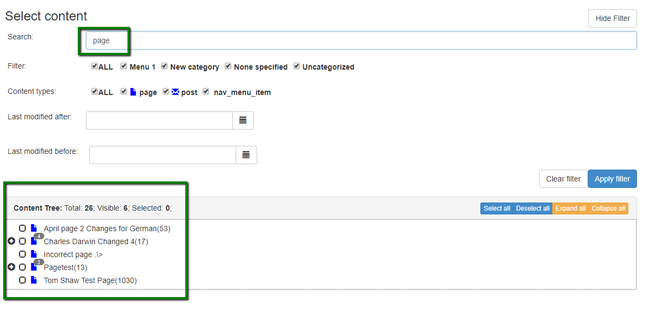
5) Click 'Export'.
This will navigate you to the next form, where To collapse the content tree, click the button one more time.
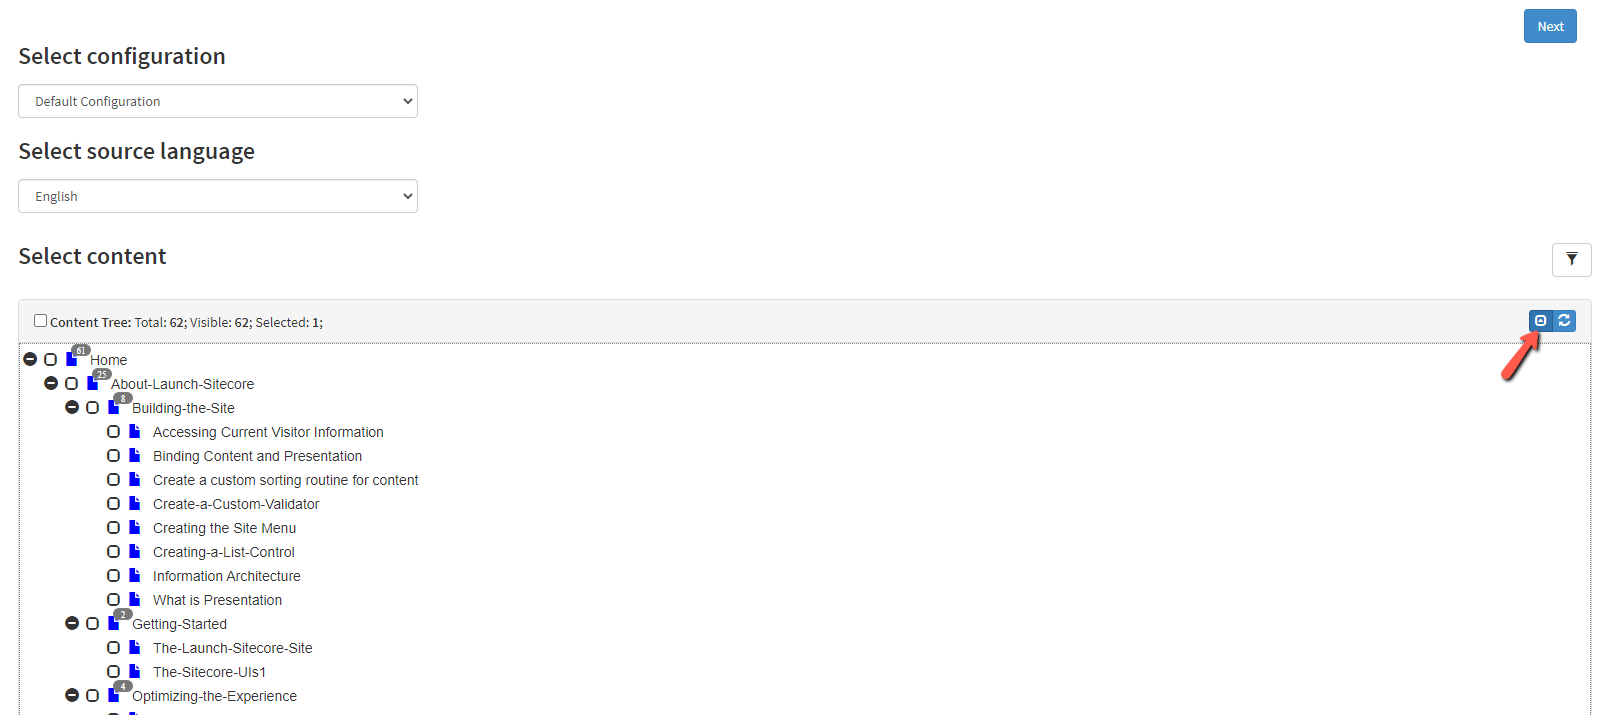
To clear the server cache and retrieve the fresh data, you need to click the refresh icon like on the screenshot below.
4) After you clicked the 'Next' button to proceed with the translation request, you need to indicate the project settings and select the target languages.
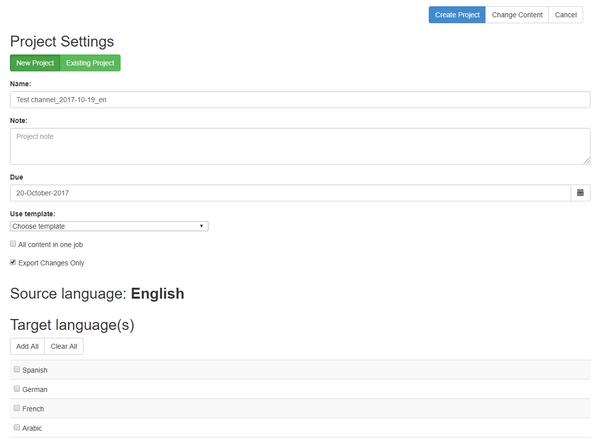
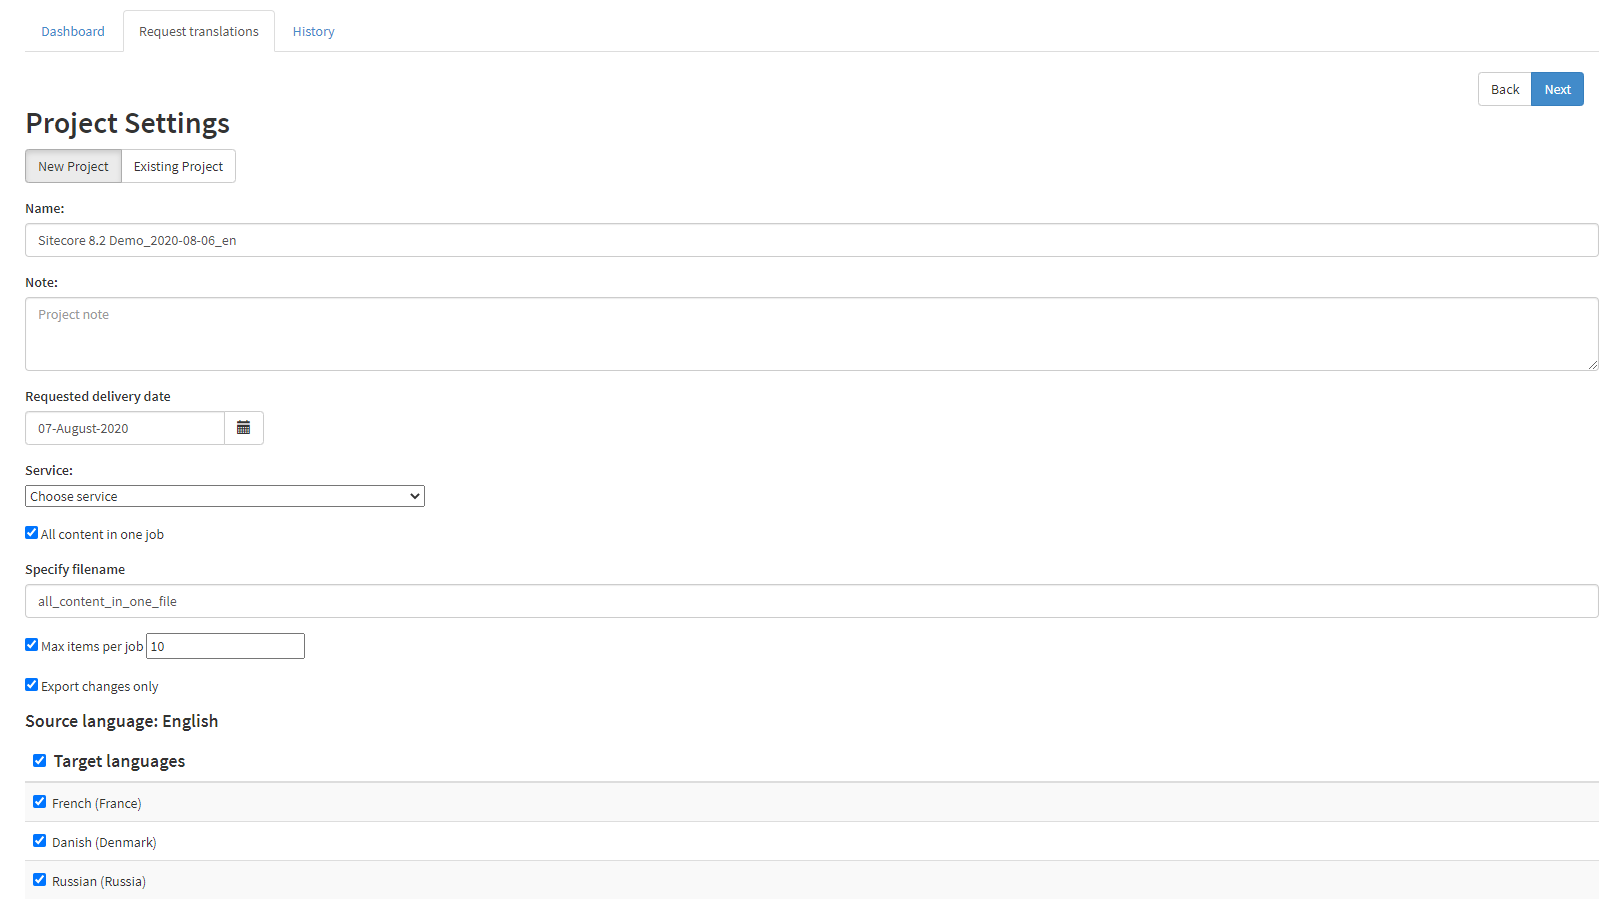
Project settings to specify:
...
- Name - a name of a project to be created in memoQ.
...
- Requested delivery date - the project's deadline.
...
- Service - gives the ability to use a memoQ project template.
- All content in one job -
...
- if this
...
- checkbox is
...
- ticked, all the content you selected will be placed as a single memoQ job. Otherwise, each content element will be sent as a separate job. Enabling this setting usually makes sense when dealing with
...
- small content elements.
- Max items per job - you can use this option if 'All content in one job' is enabled. If the 'Max items per job' checkbox is ticked, you can specify how you want to split content across jobs and what the maximum number of content elements can be added in one job. This feature should be used when you are dealing with an excessive amount of content that needs to be grouped in jobs. If the number of content items is too large to put them in one job, you can specify the number of content items per job.
- Export changes only - if this setting is enabled, our system will identify any content updates since the last
...
- translation request. If there are no changes, the content won’t be
...
- sent for translation. Otherwise, only
...
- modified content properties will be
...
- sent for translation.
Selection of target language/-s:languages
This section allows you to select the target languages for your translation.
| Note |
|---|
If you can't find a target language you need, check your language mapping or the selected template in case it limits the list of available target languages. |
| Info |
|---|
If you want to change the content selection, you can take a step back |
...
by clicking the ' |
...
Back' button. If nothing requires correction, move on to the next step. |
65) Click the 'Create Project'.This will take you to the 'Export Next' button to see the 'Translation Request Summary' form with an overview of the project and content to be exportedsent for translation. If you want 'd like to change something, you can take a step back by clicking the 'ChangeBack' button. If everything looks good: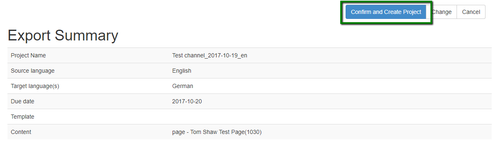
7) Click , click the 'Confirm and Create ProjectOrder' button.
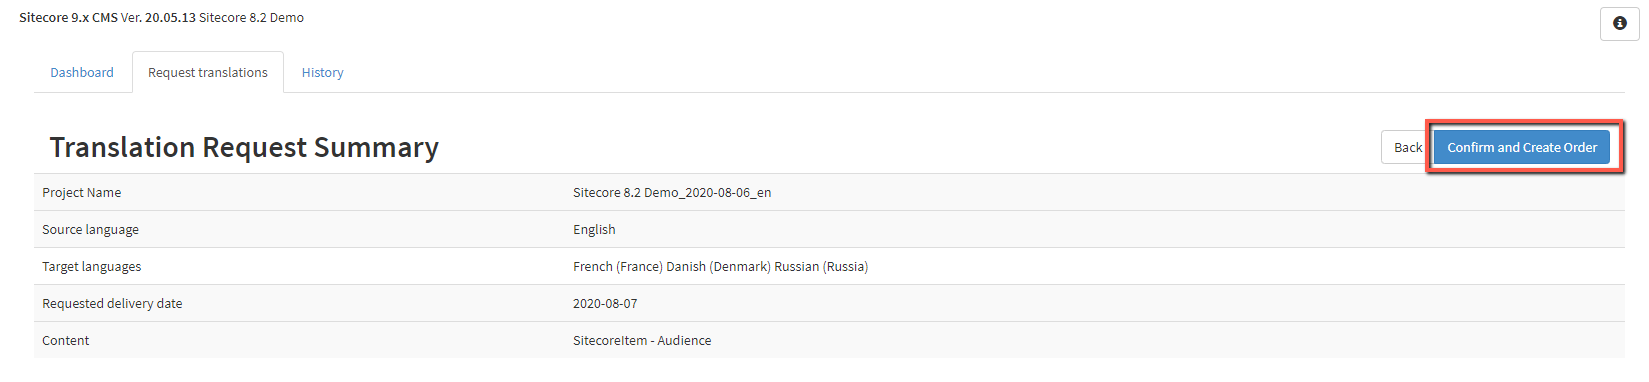
6) Once you confirm, the selected content will be exported retrieved from your system CMS and sent to TMS memoQ as a project.8
| Warning |
|---|
This action can't be interrupted. So please be attentive when checking the 'Translation Request Summary' |
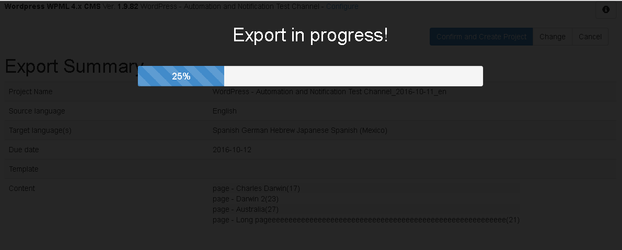
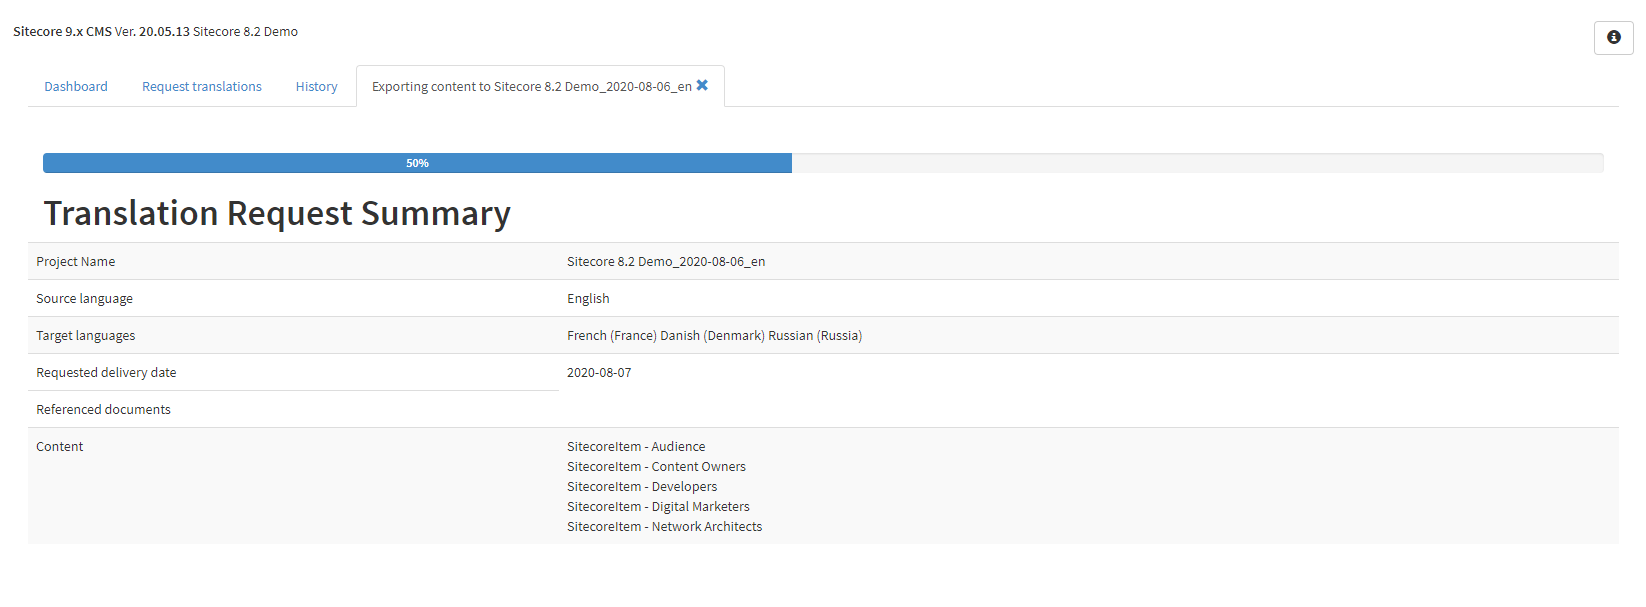
7) Wait until our system exports sends the content to memoQ.
| Warning |
|---|
Please note that export a translation request might take time depending on the content size. |
98) In the end, you'll see the export report 'Translation Request Report' with all the project details.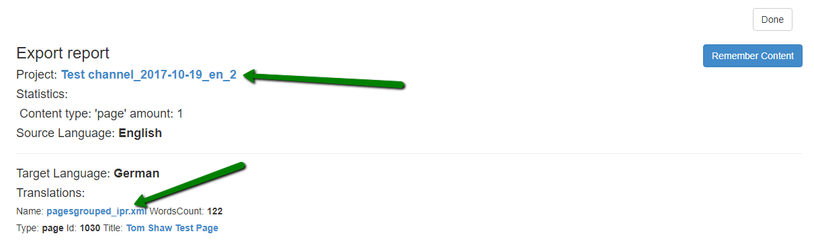
You can click on project or job name links to open them in memoQ Web (provided that it’s properly configured).
anchor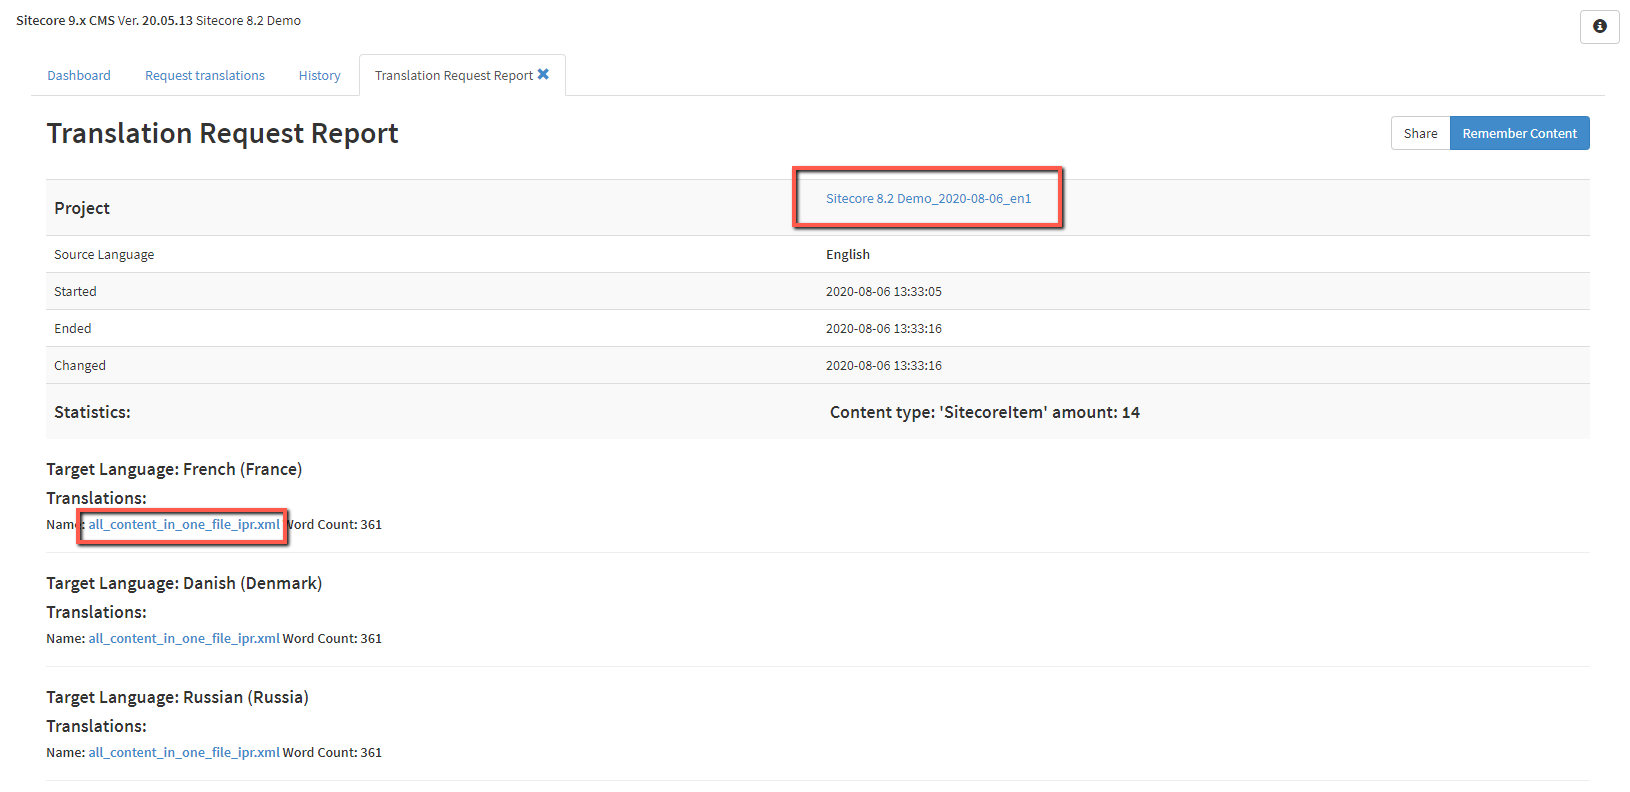
| Info |
|---|
If |
...
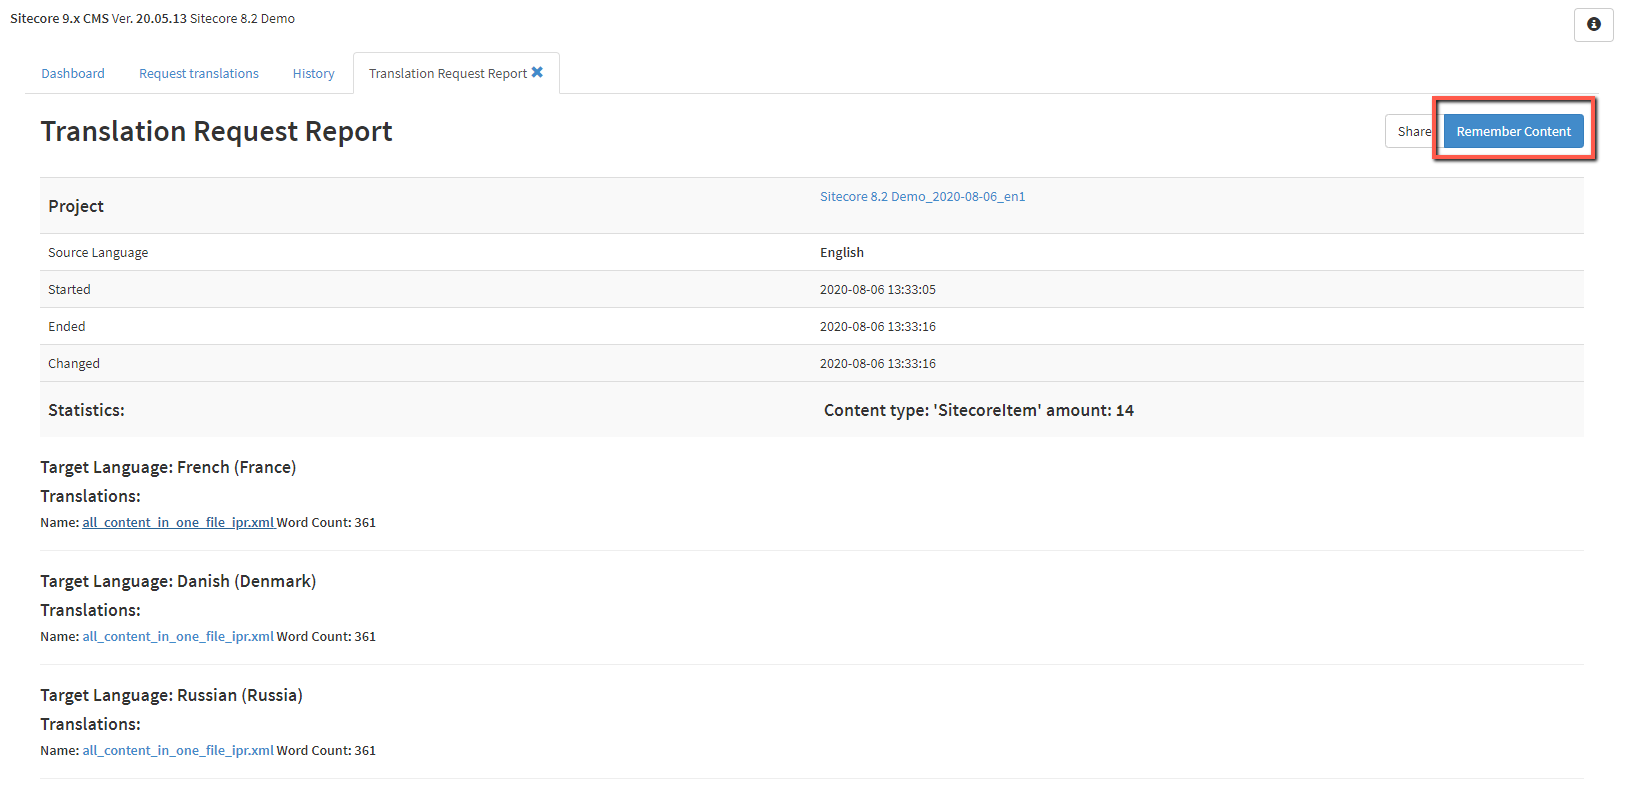
the 'Change Tracking' feature is enabled in the channel settings, you will see the 'Remember |
...
Content' button. Click it if you want to save the exported content to your content memory. This will ensure you won't order the same content twice. |
...
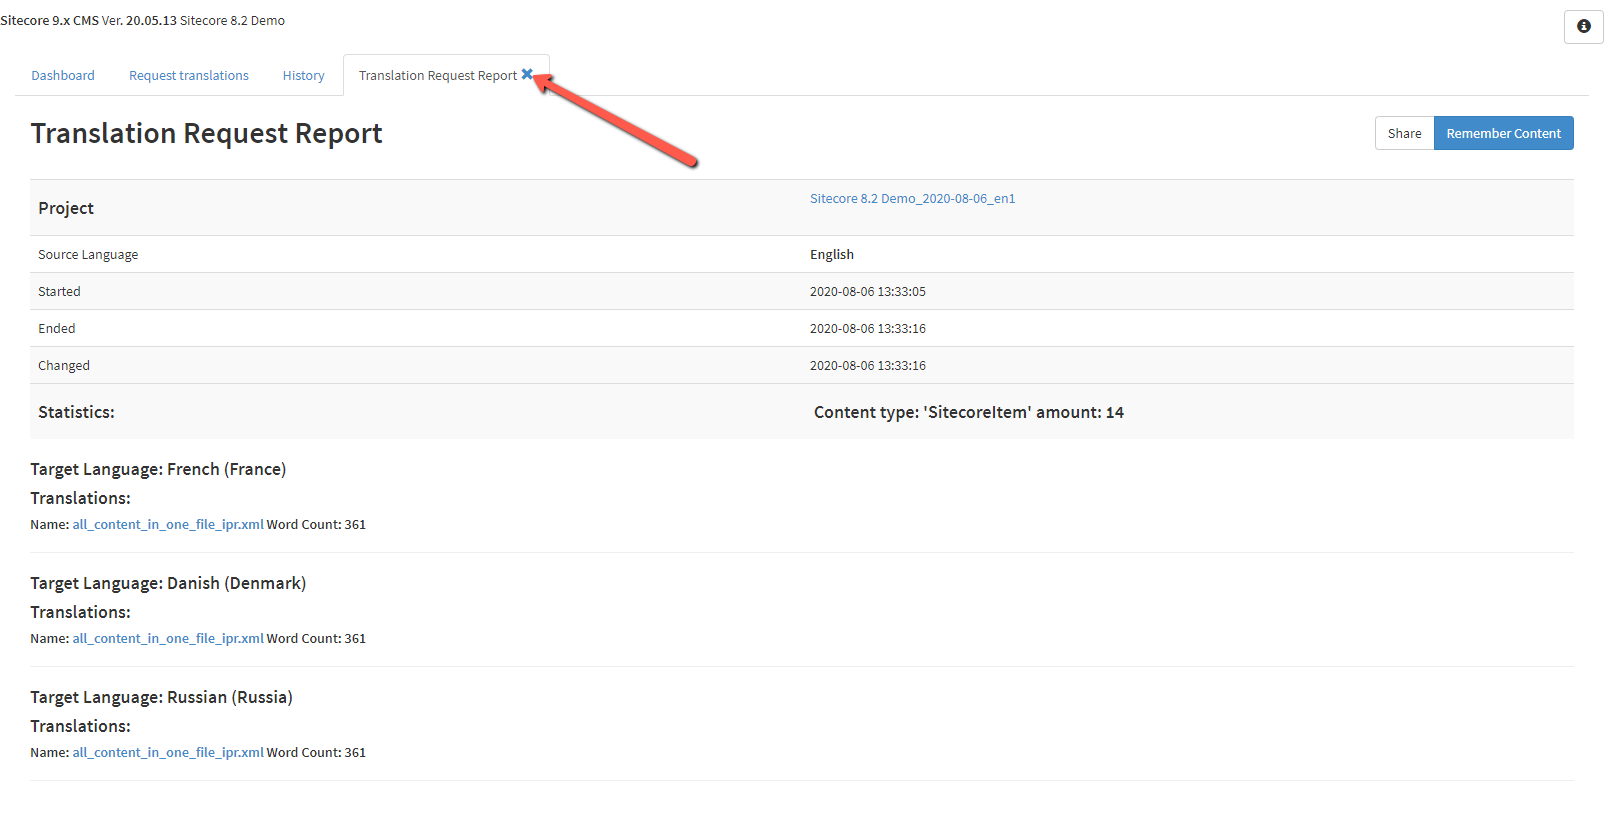
To close the 'Translation Request Report' tab, just click the X button in the right corner of the tab.
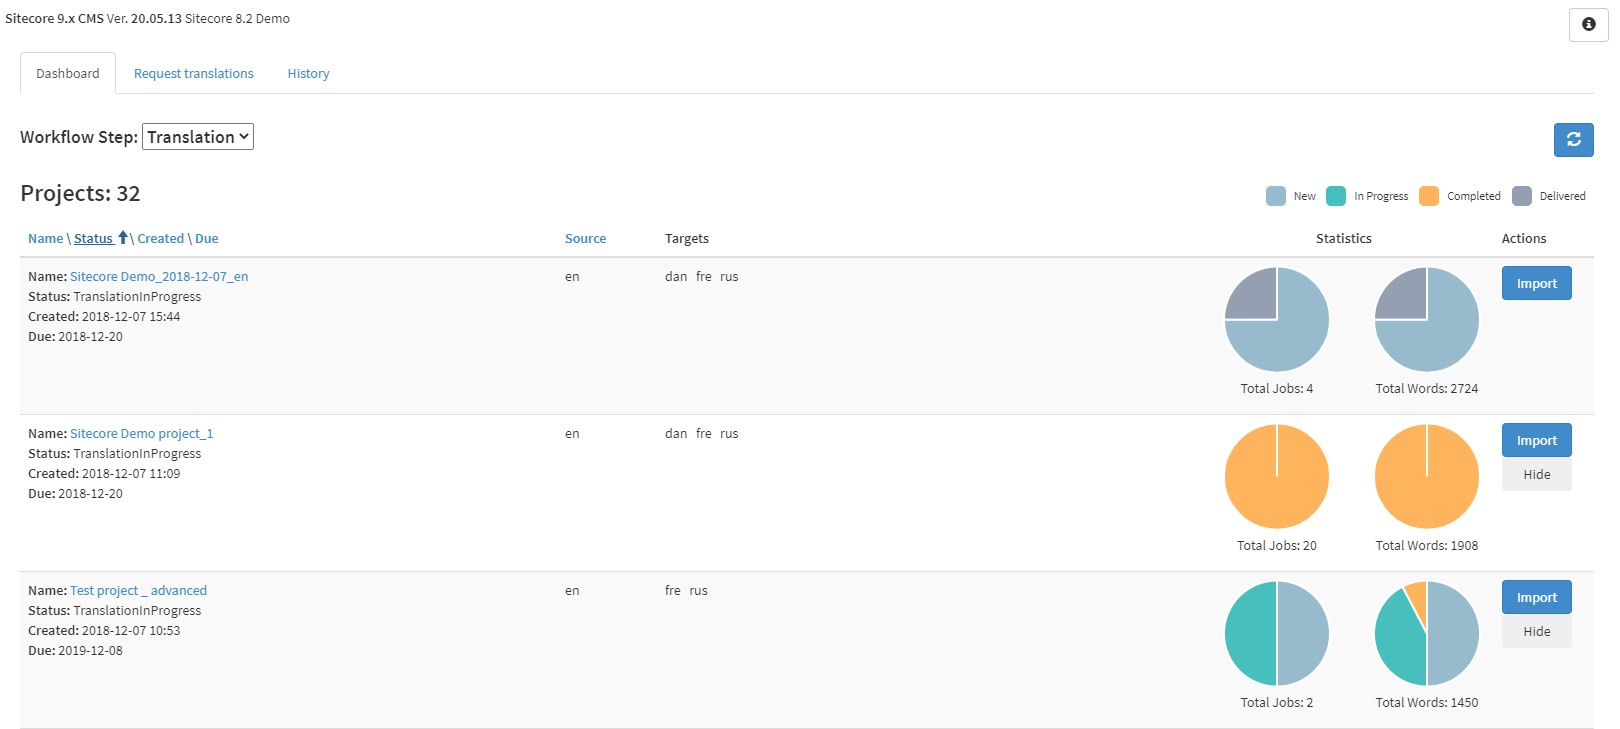
To see the created project, return to the 'Dashboard' tab.