Setup Files Connector
Supported only by Memsource and memoQ Cloud plugins
Intro
Setting up a files connector allows you to get a simple access to a set of source files and easily operate them within your localization process. This connector will also allow you to avoid a ton of manual engineering work each time it comes to dealing with a complex structured files. Cause you do the setup once, and then just operate content as you need. This article will guide you through the process of setting up a files connector.
Add New Connector
In order to add a new connector, go to the "Content Channels" list in your iLangL and click the "Add New" button in the end of a connector's list.

This will open the "Add New Content Channel" form for you:

On the "Add New Content Channel" form you have to setup following things:
- Connector Type - this is the place where you choose a connector type you are going to add - "Files Datasource Connector" in our case.
- Name - connector name, which will be represented in a list of connectors.
- Root Alias - a portal's root alias, set a server's ftp address here. Example: "ftp://ilangl.com".
- Enable content configuration from plugin - this setting allows to perform content configuration from a Memsource plugin for this files connector. Normally this configuration is done by administrator, but if you enable this setting, this can also be done by a user directly from the plugin.
- File Data Source - this is a set of settings defining a data source you are going to connect to.
- Server - ftp address or a destination of a folder on an iLangL server.
- Port - not used for a files connector, can be left empty.
- Database - not used for a files connector, can be left empty.
- Table Prefix - not used for a files connector, can be left empty.
- User Id - ftp username to connect a data source.
Note: both, user id and password are not needed if you connect to a folder on a server, where iLangL is deployed. - Password - ftp user password to connect a data source.
When you've set up a data source settings, you might want to check the availability of data. This is done via the "Check Datasource(s)" button in the bottom of the form. What it does is basically an attempt to connect to a specified data source with provided user id and a password. And if the attempt is successful, you will be able to see folders available there.

At this point you can already click the "Add New" button in the bottom of the form and a new instance of a "Files Connector" will be created.
Setup Files Connector
After following steps described above, you've created a new instance of a "Files Connector". You might now want to do some specific setup for this connector, so that it supports cases you are dealing with. The good thing about this setup is that you do it once, and from that point, you can simply operate a content you need, which is automatically processed by connector during export/import processes.
"General" Tab Settings
"General" settings tab basically allows you to update all the connector's settings you've specified during connector adding operation. This is how a Content Channel update form will look like:

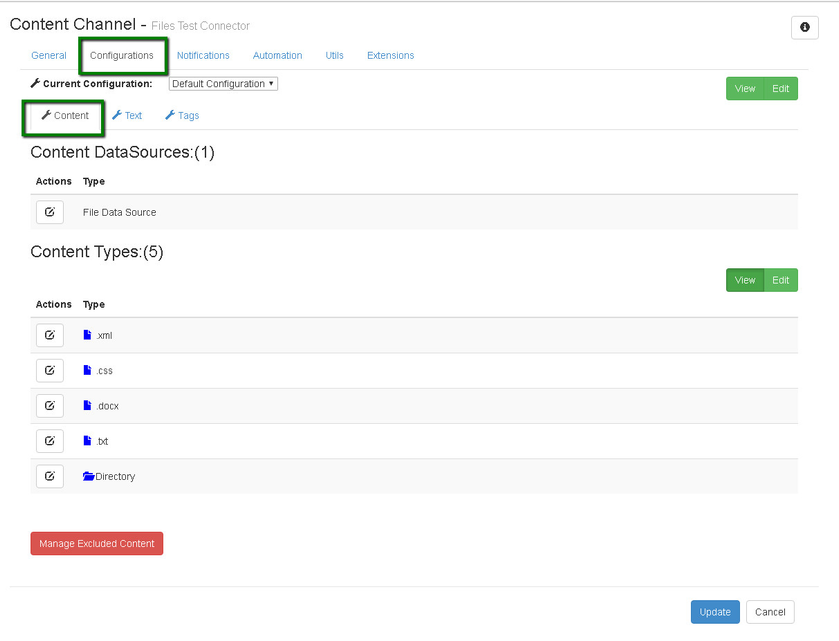
"Content" Tab Settings
In the "Content" Tab you are able to do following things:
- Setup content types which are going to be used by your files connector.
- Define which content has to be excluded and not processed during localization process.